Saturday 30 December 2017

Top 5 Favourite Makes of 2017

I can't believe that 2017 is about to come to a close! I have lots of exiting sewing projects planned for 2018 (including an anorak and some jeans) but for now I'm going back in time again. In my last post I did a 'sew-down' of the year which looked into other categories, but there were just too many favourite makes to choose just one! I've managed to narrow it down to my top five favourite makes of 2017.


I love this top so much and have worn it a lot since I made it. The fabric is really special and there is a surprise in the form of a contrast zip in the back too, which I adore! It was also a test to see if I could draft my own pattern, so I'm proud of it too. 


Have you noticed the mustard and navy trend over the past year yet?! I don't think I'll be stopping it for 2018! This is my first Linden (I have subsequently made many more) and although I haven't been able to wear it in the recent months, it's still a firm favourite. I love the colour, the fit and the style and it's a pattern that I will continue to use again and again.


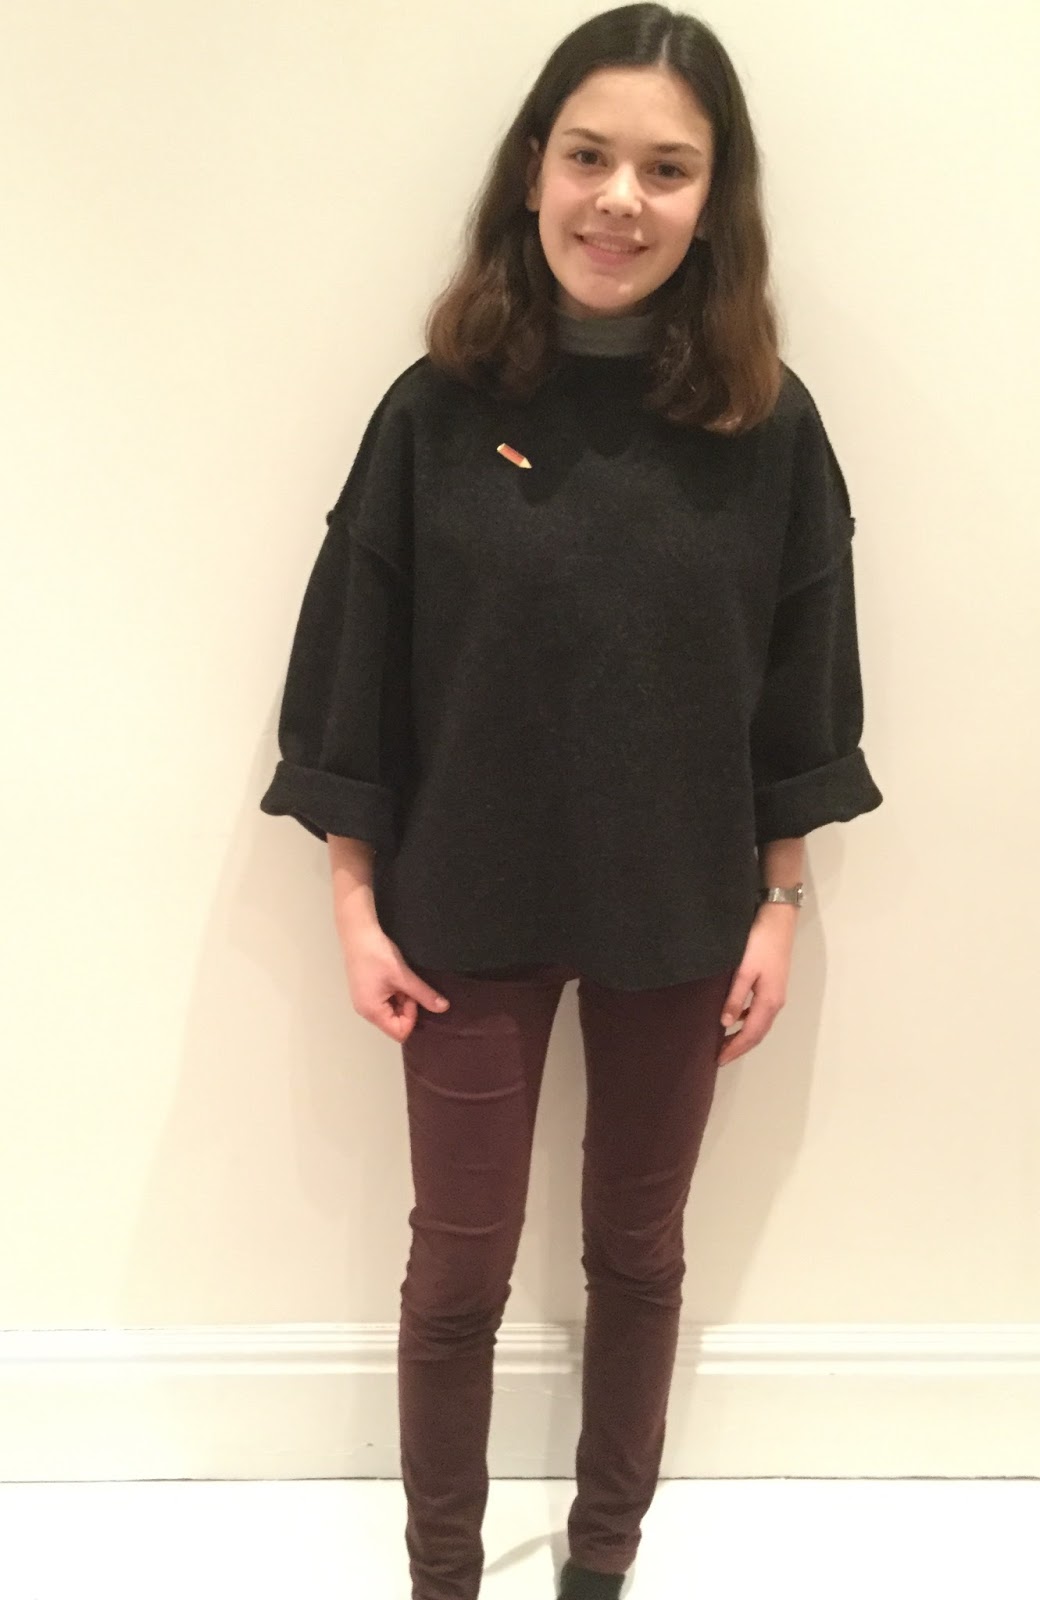
I absolutely had to include these! This is one of my favourite fabrics, and making these trousers was quite a spur of the moment decision, I had no idea I would wear them so much. I absolutely love these, and look forward to getting them out again in the spring!


I've talked about this a lot, but I just love it! It's comfy, its elegant and it's stripy. What could be better in a dress?! I've worn this so many times already despite having made it just a few months ago, and I'm hoping it will work well in Spring/Summer too. 


It was had to choose just five makes, but this skirt also had to make it on because I'm really proud of it. It's a self drafted pattern, but the best part is that it used to be a pair of jeans! The brass buttons and contrast fabric just finish it off perfectly for me, making this skirt another favourite.

Thank you so much to every one who has followed this blog throughout the year. I've enjoyed writing it very much and I'm looking forward to another year of sewing! Happy New Year.

Saturday 23 December 2017

2017 Sew Down


As 2017 draws to an end, I've decided to have a look back on my sewing projects from the past year. Now that I have all my sewing recorded in one place, It's really fun and also interesting to be able to look back through. I'll be sharing my top 5 favourite makes next week (it was too hard to choose just one!), but I also wanted to create a few more categories to be able to see exactly what worked well for me. I've loved every minute of sewing in 2017 (except for the unpicking!), and I'm looking forward to doing lots more stitching in the new year.


When I started sewing, I never would have imagined that one day I would be able to sew a garment with button holes - never mind a mens shirt for my Dad! This shirt has everything, from button holes to collar stands and cuffs. I'm so proud of it, and it feels very special to see my Dad wearing it.


Most-worn make: Burnt Orange Cleo
I'm not sure if this is strictly my most worn make because I don't keep a tally of every time I wear a garment (but then, who does?!) but I have definitely worn both my Cleos a lot. Other much worn makes include my linden sweatshirt, my pineapple top and my coco dress. I love the colour of this needlecord so much, and I always enjoy wearing this.


Least-worn make: The Day Dress
This hasn't been worn as much as I would have liked, but definitely not due to the pattern. It's a shame I don't wear it because I do really like it. I find most dresses hard to wear unless they are quite casual (like my coco dress). Because of this, I would love to make another Day Dress out of a different fabric, and maybe with a ruffle on the sleeve?


Most unexpected make: Black Denim Button Skirt
I really love this skirt, but it is definitely unexpected - It's made from a pair of my Dads old jeans! Creating something from an old garment is yet another thing that I would never have expected to be able to do when I started sewing. 


Most worn by others: Teal Linden Sweatshirt
My family are very lovely and wear the things that I have made them often. I made my Mum three tops this year, and I think that her teal linden sweatshirt is the one she wears the most. It's such a great pattern, and it looks especially nice in that fabric.


Most used pattern: Tilly and the Buttons Coco
It was close between the Coco top/dress and the Linden sweatshirt for my most used pattern of 2017, but the Coco won purely based on the number of hacks I've made from it! It's such a great base for changing a pattern. My favourites are my dress, my pineapple top, my stripy top and my raindrop top.


Favourite fabric shop: Frou-Frou Mercerie Contemporaine
I fell in love with this Parisian fabric shop when I came across it in Paris, and would urge anyone who goes to Paris to visit it! The fabrics are quite expensive, but are absolutely stunning and the presentation is stellar. I wrote about what I bought here. My Frou-Frou makes include my mustard and navy top, my Mum's blouse and my mustard skirt.


Favourite fabric: Aime-Comme Marie Ananas
I love this fabric so much, and have made two garments from two colourways, although I think that my favourite is the lighter blue that I got from Faberwood. The projects that I made are my pineapple top and my trousers.


Most exciting sewing event: The Great British Sewing Bee Live and Suzy Magazine Feature
I couldn't choose just one thing for this category. The sewing bee live was an incredible event and I absolutely loved going. You can read about my day there here. Being featured in a magazine was also a definite highlight of 2017, I still can't quite believe it!


Sunday 17 December 2017

What to Make Out of Needlecord Fabric

Needlecords are one of my favourite fabrics to sew with at this time of year. There is something about them that feels perfect for autumn and winter. I thought it would be good to do a round up of some of the clothes that I've made using needlecord, to give an idea of what patterns you could use.


The Cleo works in a lot different heavier weight fabrics such as denim and corduroy and I think it works really well in a plain needlecord especially. Tilly and the Buttons actually have some top tips for sewing with corduroy for the Cleo, as it's one of their main fabric recommendations for the pattern. I used a needlecord to make this, but a slightly thicker corduroy would work too. I would highly recommend this as a quick and easy make, I love my burnt orange needlecord Cleo. Another couple of dresses to layer over which I think would work well out of needlecord are the Papercut Patterns Yoyo Dress and the Jennifer Lauren Handmade Ivy Pinafore Dress.


Tilly and the Buttons Delphine Skirt

When I was looking over my needlecord makes, I realised how they are all Tilly and the Buttons patterns, which I guess just goes to show how much I love their patterns! My next make is my needlecord Delphine skirt, the pattern for which is in Tilly's book Love at First Stitch. I really love the colour of this particular needlecord, and I think that it's quite good for wearing around this time of year too. Skirts in general are good for making out of corduroy, as well as the Delphine I think that the Grainline Studio Moss Skirt and the Pauline Alice Rosari Skirt would look nice.


I absolutely love my needlecord Rosa shirt, I think the pattern works perfectly in needlecord for this time of year. I would definitely recommend using a lightweight, quite fine needlecord for this though. I made the shirt version, but a dress would look lovely too. Looking through these photos I've realised that I've never made anything out of a patterned needlecord, something I definitely want to try! Other dress/top patterns that would look lovely in needlecord are the Celia Top by Sew Me Something and the Raglan Dress and Top by The Avid Seamstress. 

Sunday 10 December 2017

Black Boxy Jumper


A few weeks ago, while looking for something else entirely, I came across this lovely boiled wooly/felty fabric from Fabric Land. I gave in and bought a metre of it, leaving with my head brimming with ideas. With such a plain fabric, I knew that I would have the opportunity to add some lovely details, and decided that this project would be the perfect opportunity to try out stand-up seams  as the fabric doesn't fray at all. It is quite a stiff fabric, so anything requiring drape was out of the question, but it was perfect to make a boxy jumper with, of course, the lovely stand-up seams.


For the seams, I just sewed the fabrics wrong sides together, as if I were to sew a french seam, but without then sewing the second line of stitching. For the seam allowance, I used I think 1/4 or 1/8", hardly anything so that it would stand up nicely. This worked perfectly with this fabric and would work for knits too, but would be an absolute disaster with anything that frays in the slightest! I based the pattern off a drop-sleeve jumper that I already have, which was a very simple design - the front and back bodices are pretty much a rectangles, and I then cut along the centre back to add a seam there too. I'm really glad I did this, It's something that I've noticed on quite a few items of clothing recently, and I think that it's a lovely effect.


My favourite feature this the drop down sleeve, where the shoulder stitching meets the top of the sleeve. I love how the details compromise for the plain fabric! It's hard to tell from the photos, but it has a lovely texture to it. My main problem with this jumper is that the fabric is incredibly scratchy, and while it's fine on my arms and where I can have a top underneath, I wanted to go for a higher neckline and it really rubs. Because of this I've had to wear a turtle-neck underneath, but whilst this is fine for the Winter I would like to do something about it, so I am considering sewing a bit of fleece inside the neckline, which should work nicely. For the hem, I simply left the jumper un-hemmed and then sewed a line of stitching 1/4" away from the edge.


Overall, I'm not entirely sure about this, but it is definitely growing on me. With the sleeves rolled up, it looks oversized rather than too big which is a relief, and I love wearing it with my pencil pin-badge! I also like the fabric a lot. In this picture I am 'doing a normal task', my Mum's idea so that I could see what the jumper looks like 'in action'. A surprising concept, but I actually think it worked - I was able to see what the sleeves look like rolled up instead of down! I know that it's black, but it is winter and it's a nice shade of black, if that's even possible?! I think that once I have sewn the fleece into the neckline to make it less scratchy inside it should be more wearable.

Monday 4 December 2017

Suzy Magazine Feature


A bit of exciting news today... In case you haven't heard of it, Suzy Magazine is a fairly new independent sewing magazine for 'fashion forward sewists'. It's a biannual magazine which is unique in it's lovely aesthetic and how contemporary it is. The contents of the magazine varies from top pattern picks to sewing business interviews and much more. I definitely think it's worth a read, the layout is beautiful and there are lots of lovely things inside to discover. Very excitingly, I appear in Issue 4! 


Issue 4 came out at the end of November. I answered a few questions sewing in the section of 'Sewing Stories'. It feels amazing to be in a published magazine, I still can't quite believe it! There are so many inspiring people in it and it's incredible to be part of. I loved reading the interviews with the other seamstresses, it's great to be able to discover new sewing blogs and it's interesting to read different people's answers to the same questions. I also really enjoyed the section on sewing the trends, there are so many great fabric and pattern combinations. I am determined to get some sewing done in velvet amidst the Christmas present sewing chaos!


I really can't say just how excited I am to be in Suzy Magazine. It's the first time I've done something like this. It didn't quite feel real until the magazine came out in print, at which point it became incredibly exciting! I would highly recommend it as a read, it's a lovely magazine that is quite different to the other sewing magazines around. It's layout is lovely, as is the contents, and if you do fancy reading my interview then have a read through of issue 4!

Tuesday 28 November 2017

The Little Turtle


Some things are just too wonderfully awesome not to share, and this turtle is one of them. I made it as a birthday present for a friend back in September, and managed to get a couple of photos before wrapping it up. After the unexplainable decision of choosing the gift of a handmade turtle (that sounds even stranger written down!) I had a look to see what pattern I could use. It turns out that a lot of people before me have had the idea of sewing a turtle! I saw a few options, one of which was this amazing retractable turtle, but I wanted to use a free pattern and one which was quite small. In the end I decided to this pattern from the Hobbycraft blog, which has very clear instructions and is quite irresistible! I would highly recommend using it. Although it doesn't mention that it is English Paper Pieced, the shell is sewn together by EPP, something that I was happy to do. I've mentioned previously that I love EPP, and this was really very quick to sew, don't be put off by the hand sewing as it really doesn't take that long.


I decided to use greens and teals to make my turtle, although I actually really like the pink turtle on the tutorial too. I used four different fabrics for the shell and then a solid dark green for the base, legs, tail and head. I like that the shell is symmetrical, meaning that I could repeat the fabrics equally. I decided to de-scale the pattern when I printed it, and I wanted my turtle to be quite small. I can't quite remember the percentage that I changed it too, but it was around 50-60% and this turtle ended up about 5"in diameter, I hope that helps if you are planning on changing the sizing. The only problem with this was that the legs and tail were extremely fiddly to turn the right way after sewing, and there is very minimal wadding inside - which brings me onto the subject of stuffing. I filled the shell with lentils to weigh it down and for the legs, head and tail used stuffing. I think this worked quite well, it means that the turtle will lay nice and flatly on a surface. To finish off, I put a small black bead into a bigger white bead and sewed this on for the eyes, which I think is the perfect final touch. I loved making this and although it was hard to part with, I hope I made it's new owner smile!

Wednesday 22 November 2017

Lined Tote Bag Tutorial


A tote bag is one of those things that one always needs. They can be used to carry absolutely anything, and they are also really easy to make! I’ve created a tutorial on how to make your own tote bag, with a lovely contrast fabric strip at the bottom and the opportunity to use a lovely print to make it fully lined. I have made so many of these as gifts, and I use mine all the time.

You will need:

  • About 1/2m of main fabric (to make into the straps and for the main body of the bag.)
  • 1/2m of lining fabric
  • Fabric for the trim around the bottom
  • Colour co-ordinating thread


Cut out your fabric for the front and back of the tote (fabric a) the trim around the bottom (fabric b) and the lining (fabric c). Your pieces will need to measure:
Main Fabric: 2- 12.5" x 15"
Contrast Fabric: 2- 5" x 15"
Lining Fabric: 2- 17" x 15"
For the straps: 4 - 18.5" x 2" (You can make these longer if you would prefer)


Sew together the trimming fabric and the main tote fabric to the front and the back pieces. Press open.


Top-stitch 1/4" around the seam (this is optional, but I think it gives a neater, more professional finish.


Pin, rights sides together, the front and back pieces of the tote. Sew down the two sides and the bottom. Repeat for the lining, but leave a 4" gap along the bottom edge.


Box the corners; to do this, press open the seams, line the side seam and bottom seam up (push the side seam flat), measure 1", mark a line and stitch around the line. Repeat for both corners, and for the lining. If you've never boxed corners before, you may find this tutorial useful.


With right sides together, put the front of the tote into the lining. Pin around top edge.


Sew around the whole edge. You should be catching two layers. Be careful not to sew the opening shut!


Pull the front of the tote through the hole in the lining. You should have something which looks like this:


Sew the hole in the lining shut - and by the way, isn't my lining fabric the best fabric ever?!


Press any creases, and then push the lining into the tote bag. Press around the top to get a neat, crisp finish, and topstitch around the bag. Note: this will show in the lining as well, so make sure you have a matching bobbin. 


Onto the straps! From your four 18.5" x 2" strips, sew two right sides together, leaving a gap at the bottom. Turn right side out, and press the opening closed. Repeat with the other two strips.


Topstitch the whole way around both straps using a colour co-ordinating thread and a constant seam allowance.


If you used a 1/4" seam allowance, your straps should now be 1.5" wide. Pin your straps so that they are 1" down from the top of the bag, and the end is 5" from the edge of the bag (as shown in the photo). If your bag doesn't quite measure that, then place the straps at an equal distance from the edge. Make sure that they line up on the front and back.


Sew your straps onto the bag in an 'x' shape.


Press your bag and... it's done! Your very own tote bag!!